Button making might not seem to be a suitable activity for everybody, but you
will definitely have some fun with it. The machines are easy and simple to use
for toddlers with some parental guidance.
These button makers are perfect to make gifts for friends and family,
creating name tags for birthday parties and adorning tote bags with your
favorite quotes.
How to Make a Button Maker Instructions for making a button maker step by step instructions
Although the process of creating buttons in button maker, may vary between
models from one to another, the basic steps are the same. The majority of these
machines can be operated manually and do not require electricity or batteries.
The machines are operated with your own physical power. It isn't difficult. Here
are the actions you need to take when you use a button-maker.
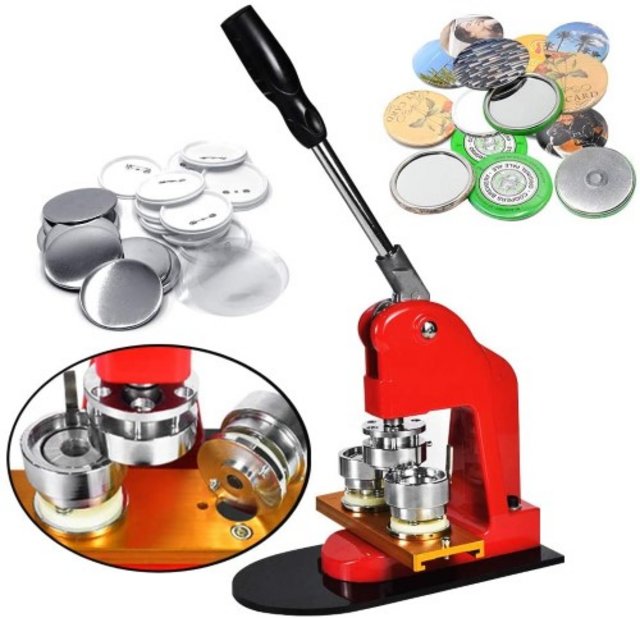
Installation of the Button Maker
Most button makers are assembled in the packaging. This is particularly true
if the size of the gadget you're using is small and hand-held. You may need to
assemble the larger size button maker you've picked.
In the majority of these machines, assembling means an easy process of
screwing the machine to the base. This can be accomplished with your hands or
with the included screwdriver. The second step is to attach the dies on the button maker machine, usually one at
the bottom and another at the top.
Sometimes the bottom has two dies, but they're all assemble in one set. These
button makers are made with two dies on the bottom. They are used to make button
key chains, pin-back buttons, and rope tie-ups.
Next, you will need to connect the lever to the upper part of the device.
This will require the use of a screwdriver. That's all you need to make sure
your button maker is ready for use.
Collecting the Button Parts
The majority of button makers come with all the button parts that are
required to make buttons. They may include a set of 100 accessories for buttons
or 1000 buttons, however generally, all of the components are put together.
There are typically three components to a button: a metal piece, a transparent
piece, and a pin back. These can be circular or come in the size that makes them
work with machines.
Printing the design
The next step is to print the design you like to be incorporated into an
engraved button for a bottle opener, keychain. You can make use of a standard
printer as well as regular paper to do the job.
Use a photo-editing software to create the design, logo or text you desire or
get something downloaded off the Internet; use your printer to print it as many
times as you need, to create the desired number of buttons.
The Design can be cut out
The design must be printed to the dimensions of your button pin back, and
then cut out in the same size. It is possible to cut the design using a regular
pair or scissors, if you want to create a circle border around the image. A
rotary cutter makes the job faster and much more accurate.
A good rotary cutter can be an investment worth making if you have the
business of making buttons. It will cut off your buttons more quickly than the
hands.
Making the different types of Buttons
The next step is to make your buttons with your button maker. Place the metal
back in one of the bottom dies (your instruction manual will inform the die you
should use).
The printed piece of paper goes next, with the design facing upwards, with
its back towards the plate made of metal. Next to the image is the myler or the
transparent plastic piece of film. All the pieces need to be aligned
perfectly.
Place the pin-back metal portion of the button into
the second bottom die close to the one in which you have inserted your
design.
You must place the accessories' backs, such as keychains, bottle openers,
etc. on the second die. The pin-back should be directed downwards, and so does
the bottle opener part.
When all of the pieces are in place and you are ready to pull on the lever
with considerable strength, making sure that you've pulled it on the initial die
- the one that has all three parts of the button joined. The top die will come
down and apply pressure to the bottom die.
When you let go of the lever, the three parts would have come together and
disappeared into the top die. The bottom die in which you'd put the design , and
the other two parts would be empty. If all the parts are still there, it means
you hadn't applied the proper amount of force into the lever. You you'll need to
try it over again.
Finalize the batch
The process is the same regardless of whether you're making a simple pin-back
button, mirror-back buttons, a key chain, or even an opener for bottles. Only
one thing differs is the back of the button, not the other three. You can
utilize the same design for making batches of every kind of buttons with the
same equipment.
A few of the most durable button maker are able to make up to 200 to 300
pieces in just an hour, which is very beneficial if you own a business. The
initial ones may be slower, but once you become more comfortable, it will take
anyone less than a few seconds to create a button.
A button-making machine is actually a very easy piece of equipment can be used by any person can use. The machines are easy to operate and comprehend which means you don't require any technical or professional knowledge.
Коментарі
Дописати коментар